


Quick answer
What this guide helps you do
Fix a Jellyfin library that is empty or missing media. Check mounts, Linux permissions, Docker paths, library folders, naming, scans and logs in the correct order.
Jellyfin beginner path
New to Jellyfin? Follow this order.
These guides form the SmallGrid Jellyfin path: install it, fix folder access, solve empty libraries, reduce unnecessary transcoding, then choose the right mini PC.
Printable helper
Prefer to work through this step by step?
Download the matching checklist and tick off the common causes while you work through the guide.
Quick answer
When a Jellyfin library is not showing files, check these eight items in order:
- confirm the files exist on the server
- confirm the disk, pool, USB drive or network share is mounted
- test whether Jellyfin can list the files
- confirm the Docker bind mount, where applicable
- confirm the library uses the path visible to Jellyfin
- compare permissions on working and missing media
- run a manual scan and check naming
- inspect the Jellyfin logs
For a native Ubuntu installation, test access as the Jellyfin service account:
sudo -u jellyfin find /mnt/media -maxdepth 3 -type f | head -20For Docker, test inside the running container:
docker exec jellyfin find /media -maxdepth 3 -type f | head -20Interpret the result:
| Result | Meaning |
|---|---|
| Files are listed | Filesystem access works; check the Jellyfin library path, scan, naming and logs |
Permission denied | Jellyfin cannot traverse or read part of the path |
| Path does not exist | The configured path or Docker destination is wrong |
| Folder is empty | The storage may not be mounted or the bind-mount source is wrong |
The decisive question is not whether your SSH account can see the media. It is whether Jellyfin can see the files from the environment in which it runs.
For the broader diagnostic path, use the Jellyfin troubleshooting hub. For native Ubuntu permissions, use Jellyfin Ubuntu folder permissions.
Why a Jellyfin library appears empty
An empty or incomplete Jellyfin library normally means one of these layers has failed:
- the storage is unavailable
- the media path is wrong
- Linux directory traversal is blocked
- the Docker source or destination path is wrong
- the library points to a host path instead of a container path
- newly imported files have different ownership or permissions
- the scan is not detecting the files
- the files are in an unexpected structure or library type
Do not reinstall Jellyfin first. A reinstall does not repair an unavailable mount, incorrect bind mount or inaccessible directory.
Diagnostic decision table
| What you find | Most likely cause | Next action |
|---|---|---|
| Host path does not exist | Wrong path or missing mount point | Locate the real path using findmnt, lsblk -f and your deployment configuration |
| Host path exists but is empty | Storage is not mounted | Repair the mount before changing Jellyfin |
Your user sees files but jellyfin does not | Linux permissions or parent traversal | Inspect namei -l, ownership, groups and ACLs |
| Host sees files but Docker does not | Wrong bind mount or old container configuration | Inspect active mounts and recreate the service correctly |
| Container sees files but Jellyfin does not | Wrong library path, library type or scan problem | Use the exact container path and rescan |
| Old media appears but new media does not | New files have different permissions or ownership | Compare one working and one missing file |
| Media disappears after reboot | Required storage was not mounted when Jellyfin started | Fix persistent mounts and startup ordering |
| Files are readable but unidentified | Naming, extension, structure or library type | Correct the media layout and inspect logs |
Check 1: Confirm the files exist on the host
Inspect the exact host path:
ls -ld /mnt/media
find /mnt/media -maxdepth 3 -type f | head -20
A useful result includes real files:
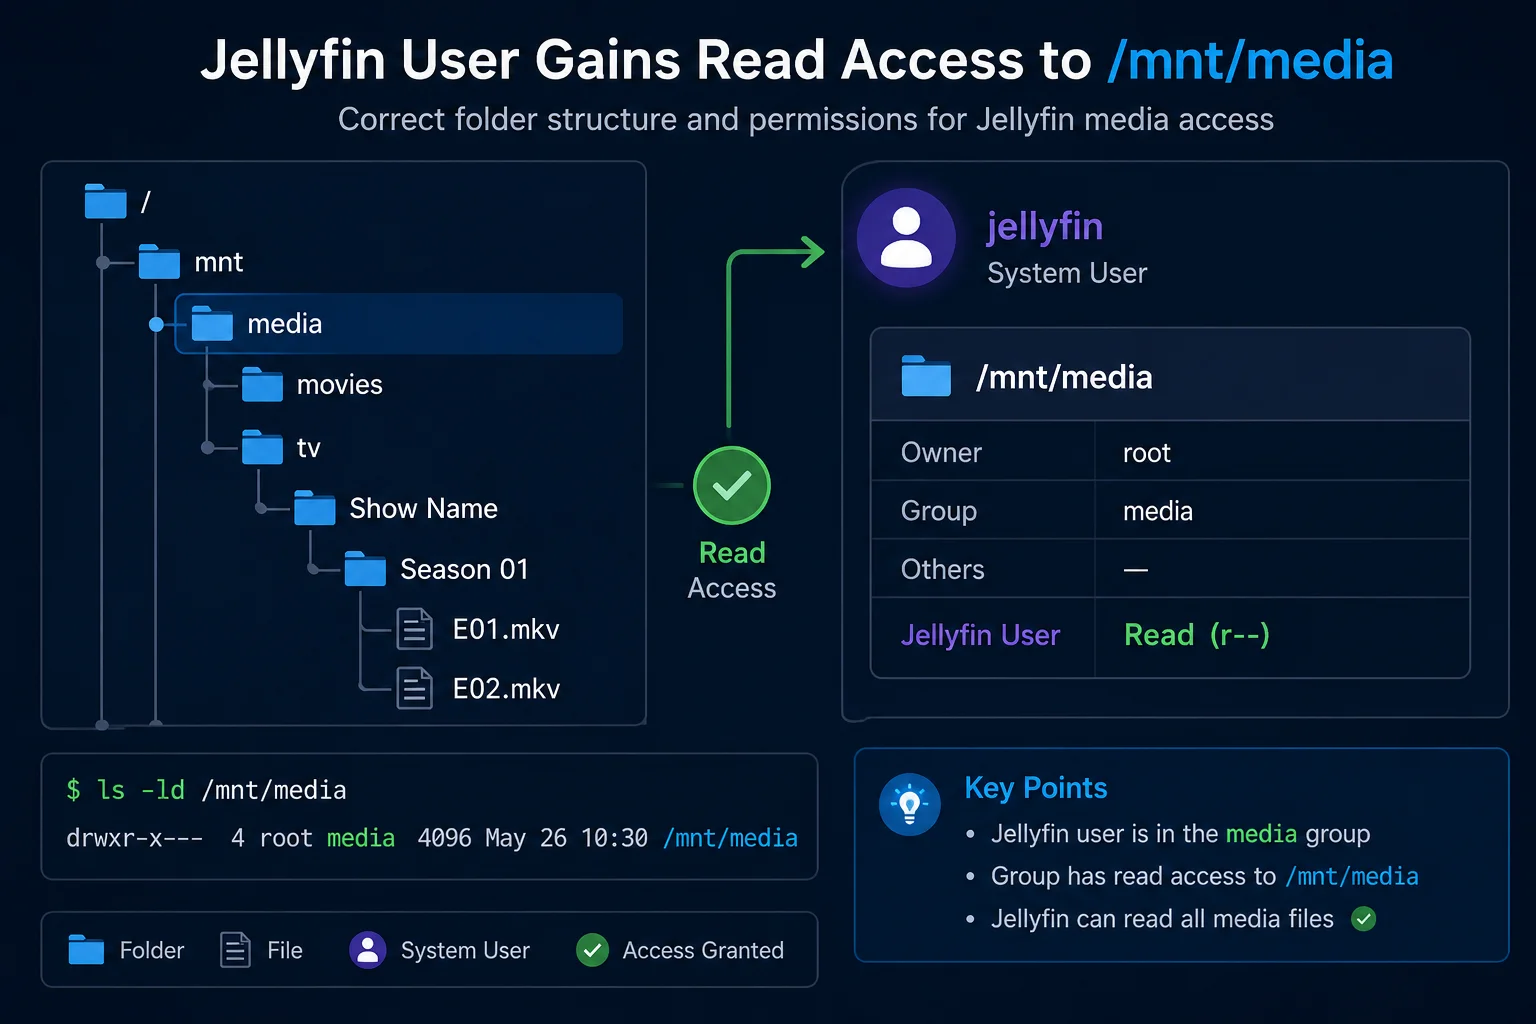
/mnt/media/tv/Show Name/Season 01/Show Name - S01E01.mkvIf find returns nothing, stop here. Jellyfin cannot index files that are not present in the host path.
Check case-sensitive path mistakes:
/mnt/media/tv
/mnt/Media/TV
These are different locations on Linux.
Count the files for later comparison:
find /mnt/media -type f | wc -lIf Sonarr, Radarr or a downloader is involved, confirm the completed media was imported into the final library rather than left in the downloads folder.
Check 2: Confirm the storage is mounted
A mount-point directory can exist even when the intended disk or share is absent. Jellyfin then scans the empty directory underneath the mount.
Check the path:
findmnt /mnt/media
findmnt -no SOURCE,TARGET,FSTYPE,OPTIONS /mnt/media
lsblk -f
For a path inside a pool:
findmnt -T /srv/media_poolExpected evidence includes:
- the intended source device or share
- the expected target
- the correct filesystem type
- suitable mount options
If findmnt returns nothing, repair the mount first.
For persistent local disks, inspect /etc/fstab:
grep -vE '^\s*(#|$)' /etc/fstabValidate changes before rebooting:
sudo mount -a
findmnt /mnt/media
Use How to mount a drive automatically with fstab when the storage is not persistent.
Check 3: Test access as Jellyfin
Native Ubuntu installation
Run:
sudo -u jellyfin ls -la /mnt/media
sudo -u jellyfin find /mnt/media -maxdepth 3 -type f | head -20
If the files appear, the operating-system access layer works. Continue to the library path, scan and naming checks.
If the command returns Permission denied, inspect every directory in the path:
namei -l /mnt/media/moviesJellyfin needs execute permission to traverse each parent directory and read permission for the files.
Inspect the service identity and ACLs:
id jellyfin
getfacl -p /mnt/media
getfacl -p /mnt/media/movies
Follow Jellyfin Ubuntu folder permissions for the complete repair workflow.
Docker installation
Test the destination inside the running container:
docker exec jellyfin ls -la /media
docker exec jellyfin find /media -maxdepth 3 -type f | head -20
This tests the live container and is stronger evidence than reading the Compose file alone.
If the host sees files but the container does not, continue to the bind-mount check.
Check 4: Verify the active Docker bind mount
Example Compose mapping:
services:
  jellyfin:
    volumes:
      - /srv/media/movies:/media/movies:ro
This creates two different paths:
Host path:      /srv/media/movies
Container path: /media/movies
Inspect the active container rather than assuming the latest Compose file was applied:
docker inspect jellyfin \
  --format '{{range .Mounts}}{{println .Type "|" .Source "|" .Destination "|" .Mode}}{{end}}'
Expected output resembles:
bind | /srv/media/movies | /media/movies | roCheck:
- the source exists and contains media on the host
- the destination is the path Jellyfin uses
- the active container includes the expected mapping
If the mapping is absent or wrong, verify the Compose project and recreate the service:
docker compose config
docker compose up -d
Then rerun docker inspect.
Read Jellyfin Docker volume paths explained when the host and container paths are unclear.
Check 5: Confirm the path configured in Jellyfin
Open:
Dashboard → Libraries → select the library → Manage foldersFor a native installation, Jellyfin normally uses the host path:
/mnt/media/moviesFor Docker, Jellyfin uses the container path:
/media/moviesDo not configure Jellyfin with /srv/media/movies when that host path is mounted inside the container as /media/movies.
A common failure looks like this:
Host contains files:             /srv/media/movies
Container contains same files:   /media/movies
Jellyfin library incorrectly uses: /srv/media/movies
Correct the library to use /media/movies, then run a scan.
Check 6: Compare working and missing media permissions
When old media appears but new files do not, compare one working path with one missing path:
stat -c '%A %U:%G %n' \
  "/mnt/media/tv/Working Show" \
  "/mnt/media/tv/New Show"
Inspect ACLs:
getfacl -p "/mnt/media/tv/Working Show"
getfacl -p "/mnt/media/tv/New Show"
Compare:
- owner
- group
- directory execute permission
- file read permission
- ACL entries
- default ACL inheritance
- downloader or importer umask
New files may be created by:
- Sonarr
- Radarr
- qBittorrent
- SABnzbd
- an SMB user
- another Docker container
Do not recursively change the entire library before identifying the difference.
Use Jellyfin not scanning new files for the dedicated new-import workflow.
Check 7: Run a scan and check the media layout
Once the path is mounted and readable, run:
Dashboard → Libraries → Scan All LibrariesRecommended movie layout:
/mnt/media/movies/Film Name (2026)/Film Name (2026).mkvRecommended television layout:
/mnt/media/tv/Show Name/Season 01/Show Name - S01E01.mkvCheck for:
- incomplete downloads
- temporary files
- archives that were not extracted
- unrecognised extensions
- television content in a movie library
- movie content in a television library
- unexpected nested folders
- filename case or spelling mistakes
Poor naming usually causes identification problems rather than a completely empty library, so only investigate naming after access is proven.
Check 8: Inspect Jellyfin logs
For a native installation:
sudo journalctl -u jellyfin --since "15 minutes ago" --no-pagerFor Docker:
docker logs --since 15m jellyfinFilter likely path and access failures:
docker logs jellyfin 2>&1 |
  grep -Ei 'permission|denied|not found|inaccessible|scan|mount'
Look for:
Permission denied- path not found
- inaccessible directory
- filesystem or mount errors
- scan failures
- unsupported file messages
Run the scan immediately before collecting the logs so the relevant messages are easy to identify.
External USB, NTFS and network storage
USB drives
If Jellyfin cannot access an external drive, confirm the drive is mounted at the expected path and that the mount options provide suitable ownership and access.
Use Jellyfin cannot access an external USB drive.
NTFS and exFAT
These filesystems often derive permissions from mount options rather than normal Linux ownership changes.
Inspect:
findmnt -no TARGET,SOURCE,FSTYPE,OPTIONS /mnt/mediaRelevant options can include:
uid=
gid=
umask=
fmask=
dmask=
Repeated chmod commands may not survive a remount. Correct the mount configuration instead.
SMB or CIFS
Check that the share is mounted:
findmnt -t cifsThen test it as Jellyfin:
sudo -u jellyfin find /mnt/media -maxdepth 2 -type f | headCIFS access may depend on uid, gid, file_mode and dir_mode mount options.
NFS
Confirm the client mount and server-side export permissions. UID and GID mapping may affect access.
Exact troubleshooting sequence
Replace the example paths with your real paths.
Native Ubuntu
find /mnt/media -maxdepth 3 -type f | head -20
findmnt /mnt/media
namei -l /mnt/media/tv
sudo -u jellyfin find /mnt/media -maxdepth 3 -type f | head -20
getfacl -p /mnt/media/tv
sudo systemctl restart jellyfin
sudo journalctl -u jellyfin --since "15 minutes ago" --no-pager
Docker
find /srv/media -maxdepth 3 -type f | head -20
findmnt -T /srv/media
docker inspect jellyfin \
  --format '{{range .Mounts}}{{println .Source "->" .Destination}}{{end}}'
docker exec jellyfin find /media -maxdepth 3 -type f | head -20
docker restart jellyfin
docker logs --since 15m jellyfin
Stop at the first failed check. Repair that layer and repeat the same command before continuing.
Common mistakes
Reinstalling Jellyfin
A reinstall does not fix mounts, permissions, Docker mappings or incorrect library paths.
Running scans repeatedly
A scan cannot index files that Jellyfin cannot access.
Using chmod -R 777
This grants unnecessary access and hides the real ownership, group or mount problem.
Configuring a Docker library with the host path
Jellyfin must use the destination visible inside the container.
Changing several things at once
You lose the evidence showing which change fixed the problem.
Related guides
- Jellyfin troubleshooting hub
- Jellyfin on Ubuntu
- Jellyfin Ubuntu folder permissions
- Jellyfin Docker volume paths explained
- Jellyfin Docker permissions
- Jellyfin not scanning new files
- Jellyfin media disappears after reboot
- Jellyfin cannot access an external USB drive
Recap
When Jellyfin is not showing files, prove each layer in order:
Host files
Storage mount
Jellyfin access
Docker mapping
Library path
New-file permissions
Scan and naming
Logs
The fastest decisive test is to list the files as the Jellyfin service account or from inside the running container. Fix the first failed layer rather than reinstalling the application or changing the entire library.
Downloadable checklist
Save the matching PDF checklist
Use these while working through the guide, or keep a copy for the next time the same problem appears.
Jellyfin Media Not Showing Checklist
Work through paths, mounts, scans, logs, and folder access in the right order.
Download PDFJellyfin Folder Permissions Checklist
Test folder access as the jellyfin user and apply safer ACL permissions.
Download PDFMore downloads are available in the SmallGrid checklists section.
Next guide
What to read next
Continue the setup path with these closely related guides.
Give Jellyfin Access to Media Folders on Ubuntu
Fix Jellyfin permission denied errors on Ubuntu. Test the service user, find blocked parent folders, apply safe ACLs, verify inheritance, and check mounted-drive options.
Jellyfin Docker Permissions: Fix Media Folder Access and UID/GID Errors
Fix Jellyfin Docker permission denied errors. Check bind mounts, container paths, UID and GID values, read-only media access, active mounts, and file visibility step by step.
Jellyfin Direct Play vs Transcoding: CPU, Quality and Compatibility
Compare Jellyfin Direct Play, Direct Stream and transcoding. See CPU use, quality differences, common triggers and how to check the active playback mode.
Jellyfin guide cluster
More Jellyfin fixes and setup guides
These guides link the main Jellyfin setup, permissions, remote access, direct play, and hardware topics together.
Jellyfin 12 Upgrade Preparation: Backup, Plugins and Migration Checklist
Prepare a Jellyfin 10.10 or 10.11 server for Jellyfin 12. Check your version, create a restorable backup, audit plugins and plan the first startup safely.
Jellyfin on Ubuntu: Low-Power Setup, Media Folders and Reboot Checks
Build a reliable low-power Jellyfin server on Ubuntu. Install Jellyfin, mount storage, fix media access, favour Direct Play, measure power, and verify the server after reboot.
Give Jellyfin Access to Media Folders on Ubuntu
Fix Jellyfin permission denied errors on Ubuntu. Test the service user, find blocked parent folders, apply safe ACLs, verify inheritance, and check mounted-drive options.
Jellyfin Docker Permissions: Fix Media Folder Access and UID/GID Errors
Fix Jellyfin Docker permission denied errors. Check bind mounts, container paths, UID and GID values, read-only media access, active mounts, and file visibility step by step.
Jellyfin Direct Play vs Transcoding: CPU, Quality and Compatibility
Compare Jellyfin Direct Play, Direct Stream and transcoding. See CPU use, quality differences, common triggers and how to check the active playback mode.
Best Jellyfin File Format for Direct Play: MP4, MKV, H.264 and HEVC
Choose the best Jellyfin file format for Direct Play. Compare MP4 vs MKV, H.264 vs HEVC, audio and subtitle compatibility, and avoid transcoding.